
> ## Documentation Index
> Fetch the complete documentation index at: https://speckle-assistant.mintlify.site/llms.txt
> Use this file to discover all available pages before exploring further.

# Using the 3D Viewer Visual

export const app_0 = "PowerBI"

export const versions_0 = "2024.04.0 & above"

export const connector_0 = "PowerBI Visual"

<div class="callout my-4 px-5 py-4 overflow-hidden rounded-2xl flex gap-3 border-2 border-red-600 bg-red-100/50 dark:border-red-600 dark:bg-red-400/20" data-callout-type="warning">
  <div class="mt-0.5 w-4" data-component-part="callout-icon">
    <svg class="flex-none w-5 h-5 text-red-700 dark:text-red-300" fill="none" viewBox="0 0 24 24" stroke="currentColor" stroke-width="2" aria-label="Warning">
      <path stroke-linecap="round" stroke-linejoin="round" d="M12 9v2m0 4h.01m-6.938 4h13.856c1.54 0 2.502-1.667 1.732-3L13.732 4c-.77-1.333-2.694-1.333-3.464 0L3.34 16c-.77 1.333.192 3 1.732 3z" />
    </svg>
  </div>

  <div class="text-sm prose min-w-0 w-full text-red-700 dark:text-red-300" data-component-part="callout-content">
    <b>Notice</b>: This user guide is based on the legacy {connector_0} connector.<br />
    We recommend using our new connectors instead, as they are easier to use and actively maintained. This legacy documentation may not be up to date.
  </div>
</div>

<Info>
  Legacy Speckle supports {app_0} versions: {versions_0}
</Info>

The 3D Viewer Visual was designed to work alongside our **Power BI Connector.** The *data connector* will output a table containing the following columns:

* **Model URL 👈**
* **URL Type**
* **Version Object ID🆕 👈**
* **Object ID 👈**
* **speckle\_type**
* **data**

<Frame>
  <img src="https://mintcdn.com/speckle-assistant/WU-XhQlBBfFr6sbO/images/legacy/powerbi/9-visual-columns.png?fit=max&auto=format&n=WU-XhQlBBfFr6sbO&q=85&s=e8a44a93f38cef4b93144b32a23b10b4" alt="Visual Columns" width="1675" height="236" data-path="images/legacy/powerbi/9-visual-columns.png" />
</Frame>

**Model URL**, **Version Object ID,** and **Object ID** are used to visualize your Speckle data in 3D.

## Viewing objects in 3D
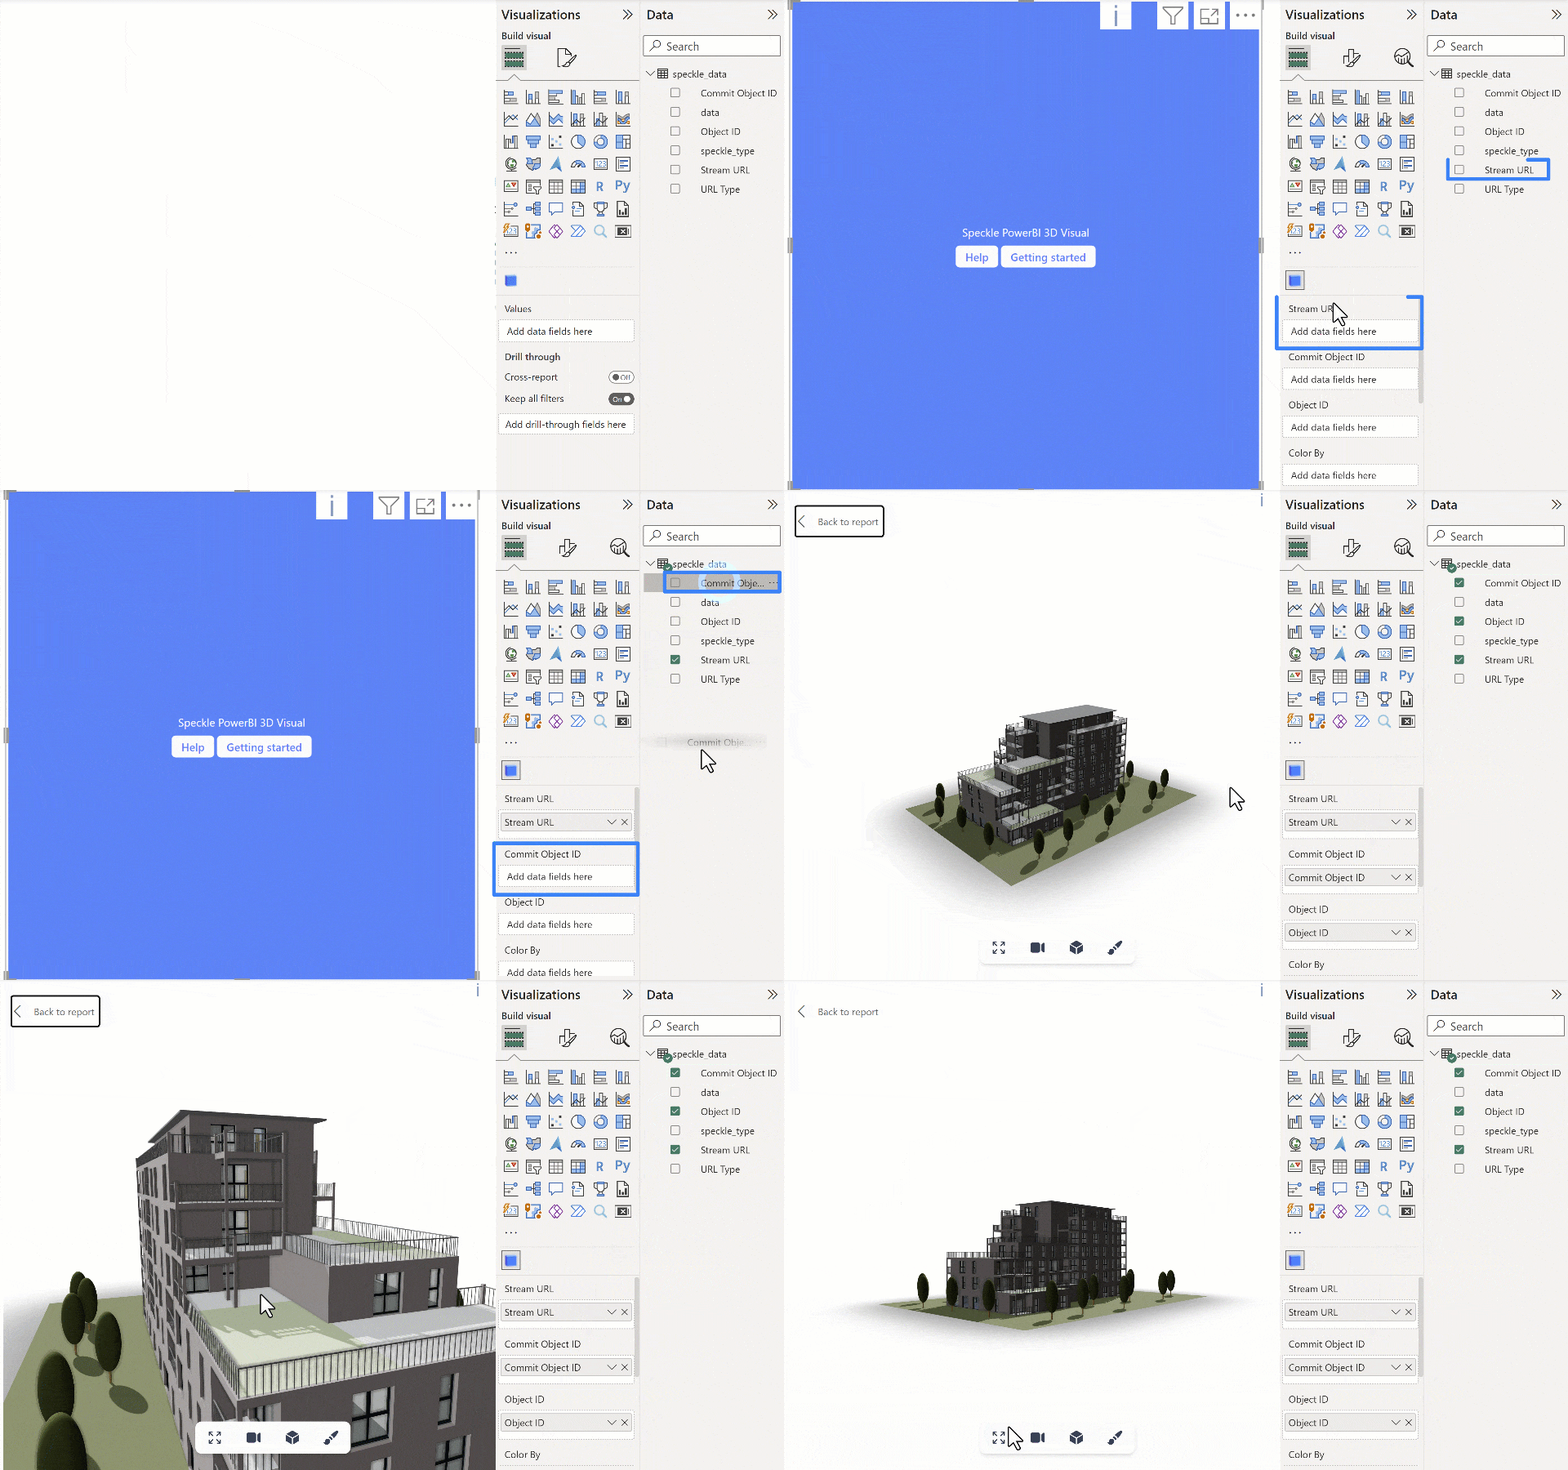
<Frame>
  <img src="https://mintcdn.com/speckle-assistant/WU-XhQlBBfFr6sbO/images/legacy/powerbi/10-viewing-objects-in-3d.gif?s=f534511370a3f7b07238075b624f1b84" alt="Viewing objects in 3D demonstration" width="960" height="600" data-path="images/legacy/powerbi/10-viewing-objects-in-3d.gif" />
</Frame>

With the Speckle 3D Viewer Visual added, you can now configure the input fields to display your Speckle data.

1. Drag the "**Model URL**" column from your data into the "`Model URL`" input field.
2. Drag the "**Version Object ID**" column from your data into the "`Version Object ID`" input field.
3. Drag the "**Object ID**" column from your data into the "`Object ID`" input field.

Once all inputs are added, 3D Viewer Visual will load the objects into the scene.

There are two extra optional fields:

* `Color By`: defines how the objects get grouped to be assigned colors.
* `Tooltip data`: defines the information shown on the tooltip when selecting an object.
<Tip>
  The `Model URL`, `Version Object ID`, and `Object ID` columns will exist on the resulting query when using the `Get by URL` function.

  If you're using the new (experimental) `Get by URL [Structured]` function, you must generate these columns in your final query table. The information is attached to the table as a `META` that can be queried in your Query Editor.
</Tip>

### Context-menu

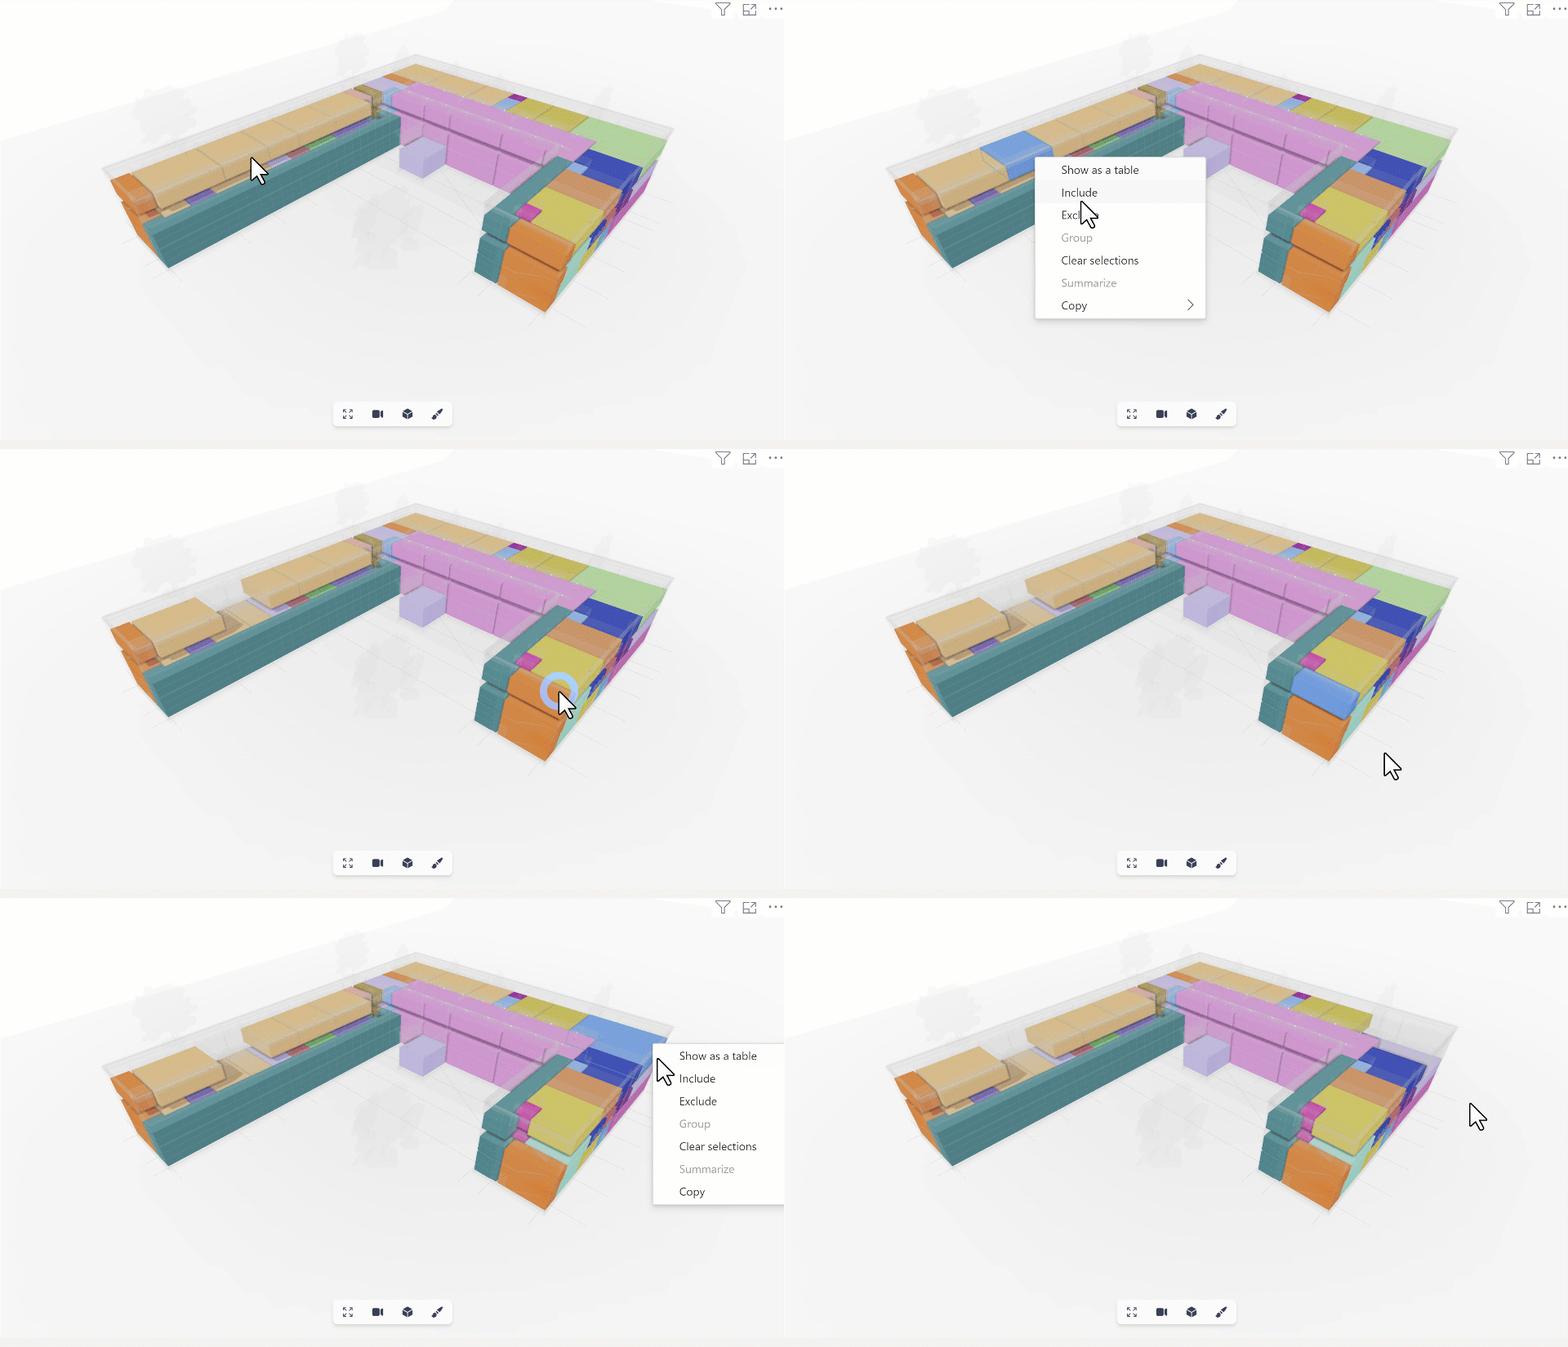
When an object is `right-clicked`, the context menu for that object will appear. This allows for easy object exclusion/isolation from the viewer in an interactive way.

<Frame>
  <img src="https://mintcdn.com/speckle-assistant/WU-XhQlBBfFr6sbO/images/legacy/powerbi/15-context-menu.gif?s=bb0501e1edf01f25793b295432deeee9" alt="Context menu demonstration" width="960" height="550" data-path="images/legacy/powerbi/15-context-menu.gif" />
</Frame>

If you want to reset the exclusions, click on the 3D Viewer Visual, go to the "**Filters**" pane, and remove the "Excluded" filters.

<Tip>
  Power BI provides the context menu; some features still need to be implemented in depth. More work will be done to improve context-menu functionality in the coming releases.
</Tip>
