> ## Documentation Index
> Fetch the complete documentation index at: https://speckle-assistant.mintlify.site/llms.txt
> Use this file to discover all available pages before exploring further.
# Models
> Organising your data in Speckle
**Models** help you organise your data within a project. They're useful for splitting
different parts of your work, such as design options, disciplines, or team responsibilities.
A model can be a direct relationship to a 3d model file, or a portion of it, or it can relate
to multiple files within a single model. Models work best when they are used to represent a
particular part of your work, a focus for a conversation, a single package deliverable
or a particular discipline, the choice is yours.
## Creating Models
A new project starts without models present. You can create an empty model in the web interface or
from a connector. This is simply a container for your data; it will have data in it
once you publish data from a supported design tool using a connector.
You can keep everything in that model or create additional ones to explore design options,
separate work by team or discipline, and organise project components more clearly.
Models give you the flexibility to structure your data to fit how you work.
 ## Managing Models
You can create as many models as you need within a project within your workspace limits.
The Speckle Web App makes it simple to add new models and switch between them.
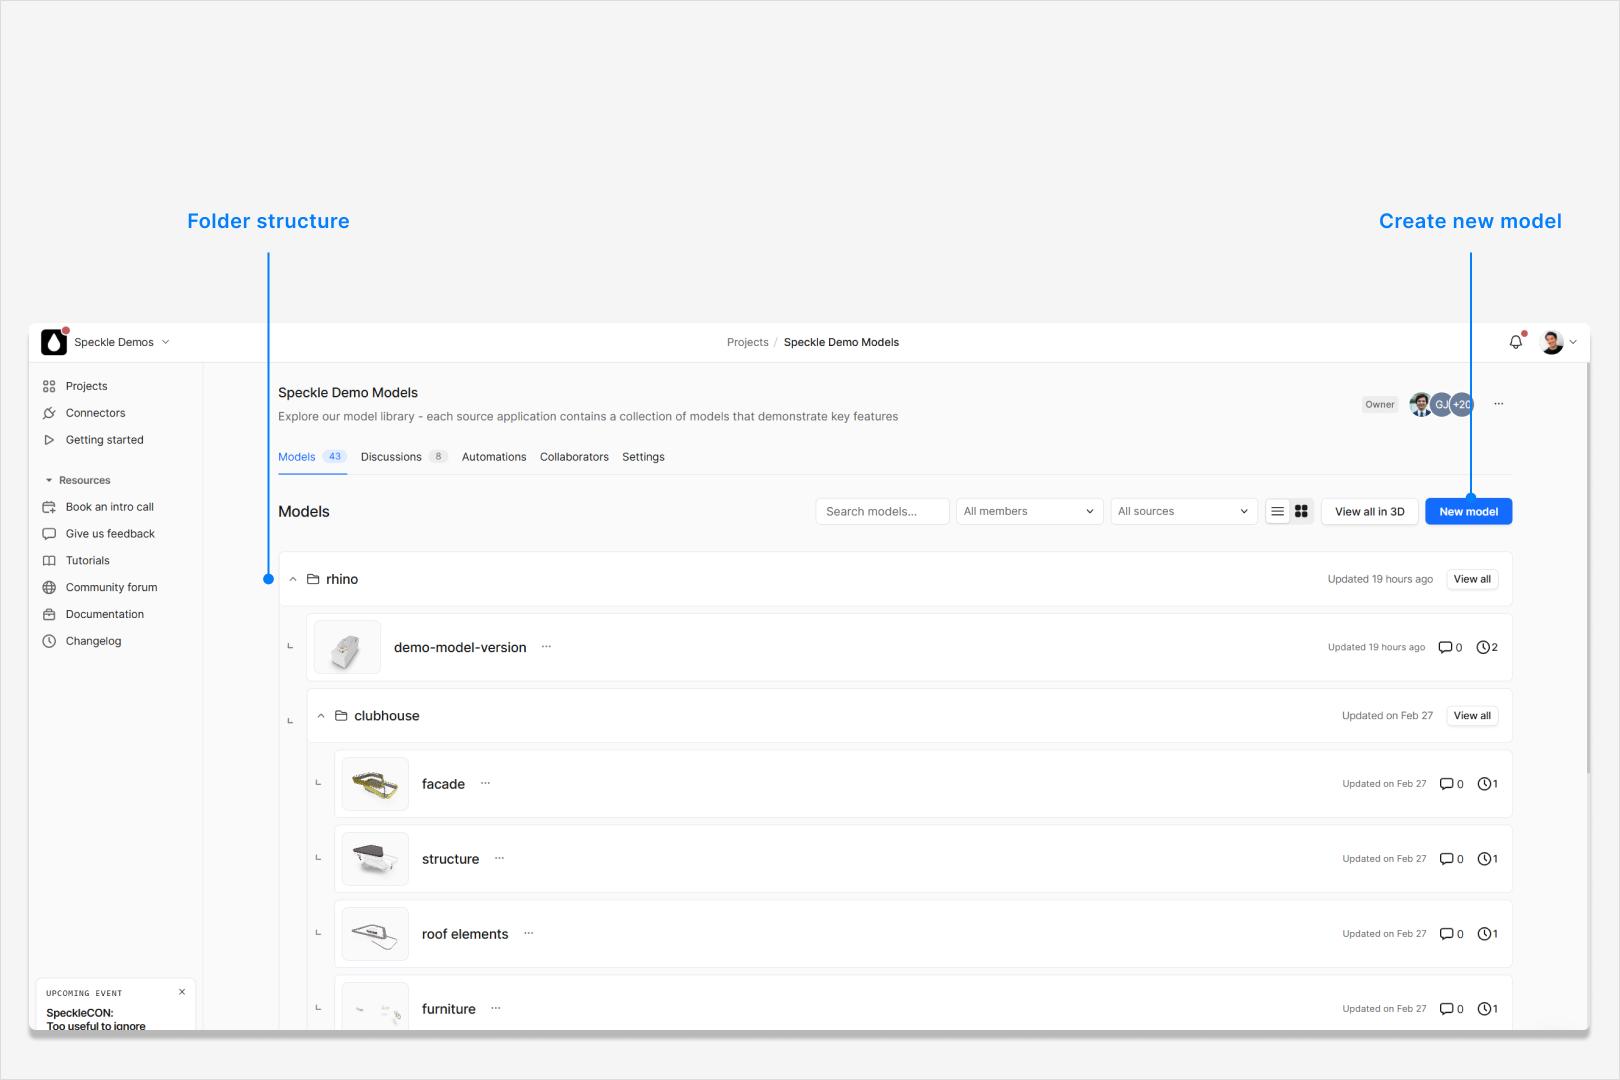
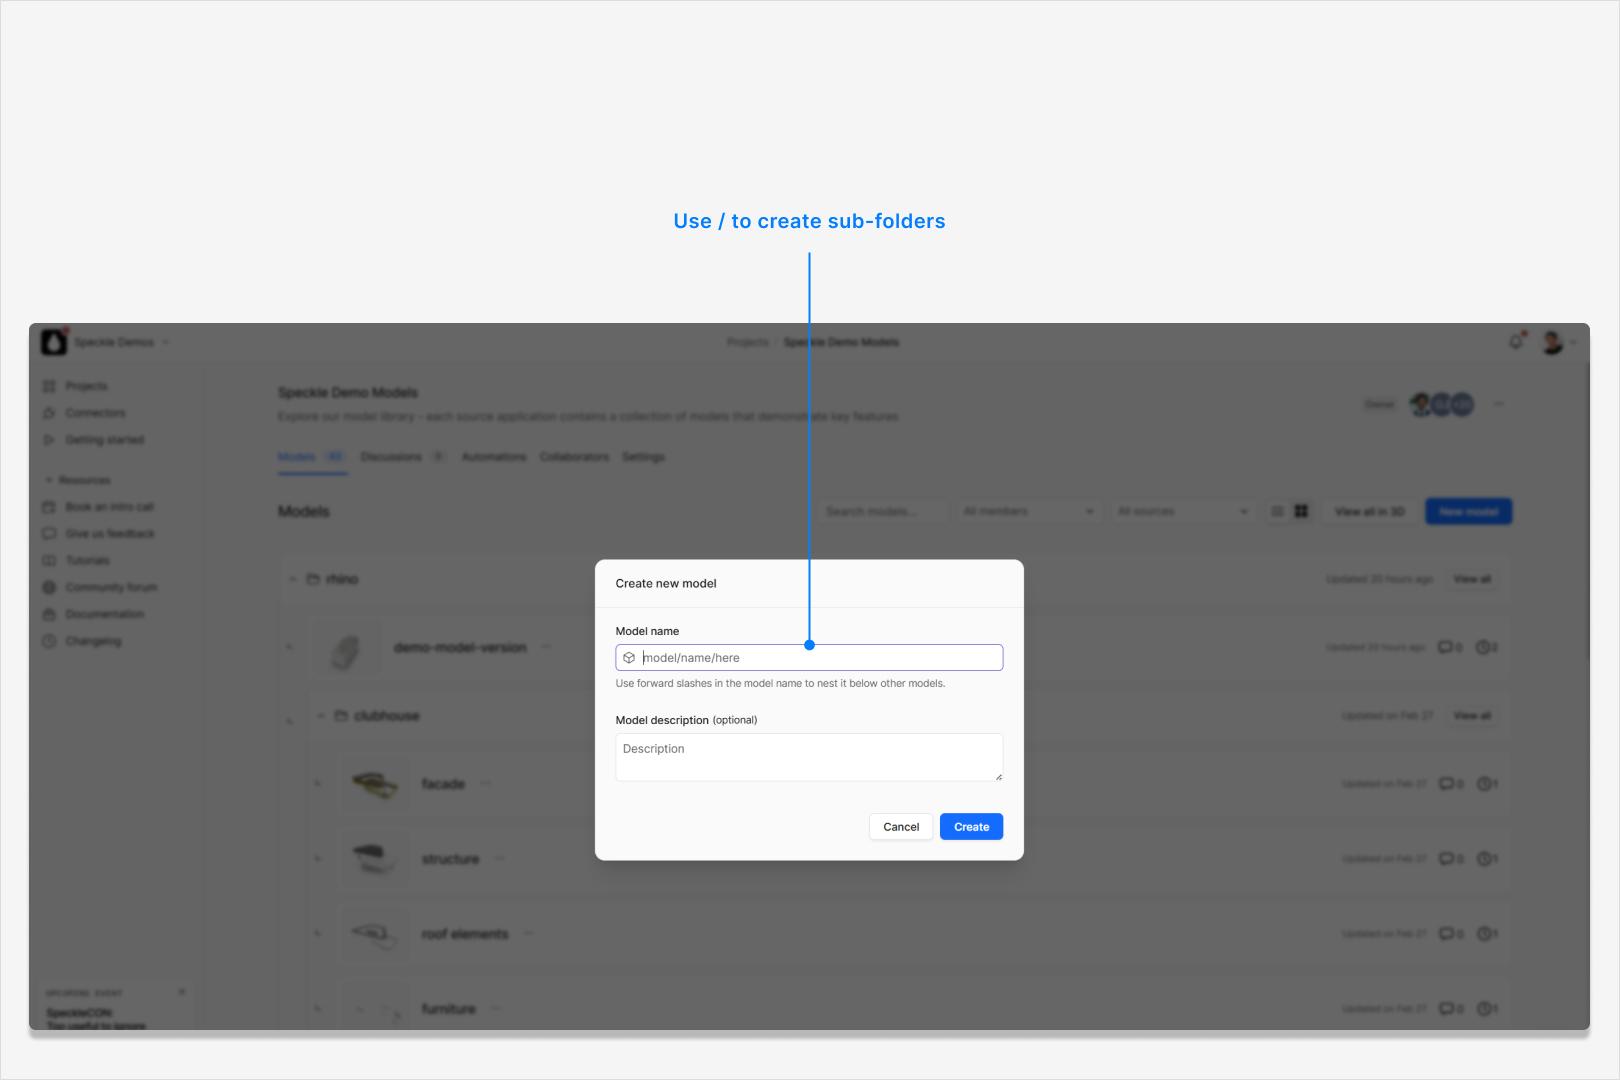
Models can be named to mimic a folder structure by using a forward slash `/` in the name,
e.g. `Building A/Floors/Floor 1`.
## Managing Models
You can create as many models as you need within a project within your workspace limits.
The Speckle Web App makes it simple to add new models and switch between them.
Models can be named to mimic a folder structure by using a forward slash `/` in the name,
e.g. `Building A/Floors/Floor 1`.
 ## Frequently Asked Questions
No, edit rights are set at the project level only at this time.
No, read-only status is set at the project level only at this time.
Here are a few common reasons:
* **Split by discipline**: For large projects, separate models by team, e.g., Architecture, Structural, and MEP. This ensures each team receives only what’s relevant.
* **Split by building**: If your project includes multiple buildings, keep them in one project but create separate models like Building A, Building B, and Building C.
* **Explore design options**: Want to present different façade concepts? Create models like Option A, Option B, and Option C and switch between them to show your client.
In Speckle, you can federate models by loading multiple models into the same view — even if created separately.
This is useful for working with different teams or disciplines. For example, view the architecture, structure, and MEP models together in a single, coordinated view without merging them into one file.
Federating models helps you:
* Compare design options
* Coordinate between disciplines
* Keep models separate while viewing them side by side
You can do this directly in the Speckle 3D viewer or in supported
design tools using our **connectors**.
You can create as many models as needed within a project. The Speckle Web App makes it simple to:
* Add new models
* Rename models
* Switch between models
This helps you keep your work organised and ensures each model is used as intended.
You can delete a model by selecting the **Delete model** button in the model settings drop-down found on the models list page.
This will remove the model from the project and **all associated data**.
You can have as many models as you need in a project. However, the number of models you have in total in your workspace
across all projects may be limited by your workspace plan.
You can switch between models by selecting the model from the models list page.
This will open the model in the Speckle Web Viewer.
Yes, you can rename a model by selecting the model from the models list page and clicking the **Rename model** button.
You can move a model to another folder by selecting the model from the models list
page and clicking the **Rename model** button.
It is the presence of `/`s in the model name that determines the folder structure.
You can have as many folders as you need in a project. It is the presence of `/`s in the
model name that determines the folder structure. However, it may be preferable to only use
one or two levels of folders to keep your models organised.
Theoretically no, but the performance of the 3D viewer will be impacted if it is large number of
extremelly detailed objects. It can be benefical to break models up and federate them together
as required to keep the performance high.
## Frequently Asked Questions
No, edit rights are set at the project level only at this time.
No, read-only status is set at the project level only at this time.
Here are a few common reasons:
* **Split by discipline**: For large projects, separate models by team, e.g., Architecture, Structural, and MEP. This ensures each team receives only what’s relevant.
* **Split by building**: If your project includes multiple buildings, keep them in one project but create separate models like Building A, Building B, and Building C.
* **Explore design options**: Want to present different façade concepts? Create models like Option A, Option B, and Option C and switch between them to show your client.
In Speckle, you can federate models by loading multiple models into the same view — even if created separately.
This is useful for working with different teams or disciplines. For example, view the architecture, structure, and MEP models together in a single, coordinated view without merging them into one file.
Federating models helps you:
* Compare design options
* Coordinate between disciplines
* Keep models separate while viewing them side by side
You can do this directly in the Speckle 3D viewer or in supported
design tools using our **connectors**.
You can create as many models as needed within a project. The Speckle Web App makes it simple to:
* Add new models
* Rename models
* Switch between models
This helps you keep your work organised and ensures each model is used as intended.
You can delete a model by selecting the **Delete model** button in the model settings drop-down found on the models list page.
This will remove the model from the project and **all associated data**.
You can have as many models as you need in a project. However, the number of models you have in total in your workspace
across all projects may be limited by your workspace plan.
You can switch between models by selecting the model from the models list page.
This will open the model in the Speckle Web Viewer.
Yes, you can rename a model by selecting the model from the models list page and clicking the **Rename model** button.
You can move a model to another folder by selecting the model from the models list
page and clicking the **Rename model** button.
It is the presence of `/`s in the model name that determines the folder structure.
You can have as many folders as you need in a project. It is the presence of `/`s in the
model name that determines the folder structure. However, it may be preferable to only use
one or two levels of folders to keep your models organised.
Theoretically no, but the performance of the 3D viewer will be impacted if it is large number of
extremelly detailed objects. It can be benefical to break models up and federate them together
as required to keep the performance high.